This post contains affiliate links, meaning we may earn a small commission if you purchase through our links—at no extra cost to you. We only recommend kitchen tools, ingredients, and supplements we trust and use ourselves!
There’s something truly special about the smell of fresh bread baking in the oven. It fills the kitchen with warmth, comfort, and a sense of home. For years, I believed that making bread from scratch required hours of kneading, proofing, and waiting. But everything changed when I discovered this quick and foolproof bread recipe.
I remember the first time I made it. It was a busy evening, and I had forgotten to buy bread at the store. Instead of running out, I decided to try making my own. I didn’t have much time, so I needed a simple recipe—one that wouldn’t require yeast proofing or long rising times. To my surprise, within minutes, I had a soft, airy dough ready for the oven. Just 25 minutes later, I pulled out a golden loaf, brushed it with butter, and took my first bite. It was soft, slightly chewy, and had the perfect homemade flavor.
That was the moment I stopped buying store-bought bread. Since then, I’ve made this recipe countless times, tweaking and perfecting it along the way. Now, it has become a staple in my kitchen, and I can’t wait to share it with you. Whether you’re a beginner or an experienced baker, this is the one bread recipe you’ll want to keep forever.
Why This Bread Recipe is a Game-Changer
1. Quick and Easy
Traditional bread recipes often require hours of rising and kneading. This one, however, comes together in just minutes. There’s no need for long proofing times or complicated steps—just mix, knead briefly, and bake.
2. Simple, Everyday Ingredients
This bread uses basic pantry staples like flour, yeast, sugar, salt, and oil. There’s no need for special ingredients, making it a convenient option for any time you need fresh bread.
3. No Special Equipment Needed
Unlike some bread recipes that require stand mixers, bread machines, or fancy tools, this one can be made with just a mixing bowl and your hands. It’s straightforward, making it perfect for anyone new to baking.
4. Perfect Texture and Flavor
Despite its simplicity, this bread has a wonderful texture—soft on the inside with a slightly crisp crust. The combination of milk brushing before baking and butter brushing afterward creates a rich, golden finish.
5. Versatile for Any Use
This bread isn’t just for slicing and eating plain. It makes the perfect base for sandwiches, toast, bruschetta, and more. You can also use it as a side for soups, salads, or even turn it into homemade croutons.
Ingredients
| Ingredient | Amount |
|---|---|
| Wheat flour, sifted | 350g |
| Sugar | 1 teaspoon |
| Salt | 1 teaspoon |
| Dry yeast | 5g |
| Boiled (but not hot) water | 210ml |
| Vegetable oil | 30g |
| Additional flour | For dusting |
| Milk | For brushing |
| Butter | For brushing |
Directions
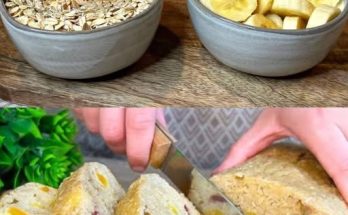
- Prepare the Dough – In a mixing bowl, combine sifted flour, sugar, salt, and dry yeast. Gradually add warm water and vegetable oil, mixing until a dough forms.
- Knead & Rest – Knead the dough for about 5 minutes until smooth. Cover and let it rest for 10 minutes.
- Shape & Proof – Dust a surface with flour and roll out the dough to your desired shape. Place it on a baking tray, cover, and let it rise for 20-30 minutes.
- Bake to Perfection – Preheat the oven to 375°F (190°C). Brush the dough with milk and bake for 20-25 minutes until golden brown.
- Final Touch – Remove from the oven and immediately brush with butter for a soft, glossy finish. Let cool slightly before slicing and serving.
Nutritional Information (Per Slice, Approximate)
| Nutrient | Amount |
|---|---|
| Calories | 150 |
| Carbohydrates | 28g |
| Protein | 4g |
| Fat | 3g |
| Fiber | 2g |
| Sodium | 200mg |
Ways to Enjoy This Quick Bread
Once you make this bread, you’ll find countless ways to enjoy it. Here are some delicious serving ideas:
- Classic Buttered Toast – Slice it and toast it with butter for a simple yet satisfying breakfast.
- Sandwich Bread – Use it to make fresh sandwiches with your favorite fillings.
- Garlic Bread – Brush with garlic butter and toast it in the oven for a crispy, flavorful side.
- Bruschetta Base – Top with diced tomatoes, basil, and olive oil for an Italian-inspired snack.
- Dipping Bread – Serve with soups, stews, or dips for a hearty meal.
- French Toast – Transform it into a sweet breakfast treat by soaking in eggs and milk before frying.
Frequently Asked Questions (FAQs)
1. Can I Use Whole Wheat Flour Instead of White Flour?
Yes, but whole wheat flour absorbs more liquid, which can make the bread denser. If using whole wheat flour, try replacing only half of the all-purpose flour for a softer texture. You may also need to add a little extra water to keep the dough from becoming too dry.
2. Do I Need to Let the Dough Rise?
This recipe is designed to be quick, so the rise time is minimal. The dough rests briefly, but it doesn’t require the long proofing times that traditional bread recipes do. This means you can have fresh bread ready in under an hour.
3. How Do I Store This Bread?
To keep the bread fresh, store it in an airtight container or wrap it in a clean kitchen towel. It will stay soft for up to 2 days at room temperature. If you need to store it longer, refrigerate it for up to a week or freeze it for up to three months.
4. Can I Make This Bread Without Yeast?
Yeast gives the bread its light, airy texture. However, if you want a yeast-free version, you can substitute baking powder for the yeast. The result will be more like a quick bread, with a denser texture.
5. Why Is My Bread Too Dense?
A few factors can cause dense bread:
- Not kneading the dough enough—kneading helps develop gluten, which gives the bread structure.
- Using too much flour—measure carefully to avoid making the dough too dry.
- Overbaking—check the bread a few minutes before the recommended baking time ends to prevent it from drying out.
6. Can I Make This Bread in a Loaf Pan?
Yes! While this bread is often shaped into a free-form loaf, you can also bake it in a standard loaf pan for a more structured shape. Just make sure to adjust the baking time slightly, as loaf pans may require a few extra minutes in the oven.
7. Can I Add Extra Flavors to the Dough?
Absolutely! This bread is a great base for experimentation. Try adding:
- Herbs & Spices: Rosemary, oregano, garlic powder, or onion powder for an aromatic twist.
- Cheese: Fold in shredded cheese for a cheesy loaf.
- Seeds & Nuts: Sprinkle sesame seeds, sunflower seeds, or chopped nuts on top before baking.
Tips for the Best Homemade Bread
- Use Fresh Yeast: Old yeast may not activate properly, leading to flat bread.
- Measure Ingredients Accurately: Too much flour or too little liquid can affect the dough’s texture.
- Don’t Skip the Butter Brushing: Brushing the bread with butter right after baking enhances flavor and keeps the crust from becoming too hard.
- Let It Cool Before Slicing: Cutting into the bread too soon can make it doughy inside. Let it cool for at least 15 minutes for the best texture.
Conclusion – The Joy of Baking Bread at Home
There’s something deeply satisfying about making your own bread. It’s more than just a recipe—it’s a process that connects you to a long tradition of home baking. This quick and easy bread proves that homemade doesn’t have to mean complicated.
Whether you’re a first-time baker or someone looking for a fast, no-fuss bread recipe, this is the perfect one to try. Once you experience the smell of fresh bread in your kitchen and take that first warm bite, you’ll understand why I stopped buying bread altogether.
So, the next time you find yourself reaching for a loaf at the store, consider making this instead. With just a handful of ingredients and a little time, you can enjoy the satisfaction of homemade bread that’s soft, flavorful, and made with love. Happy baking!
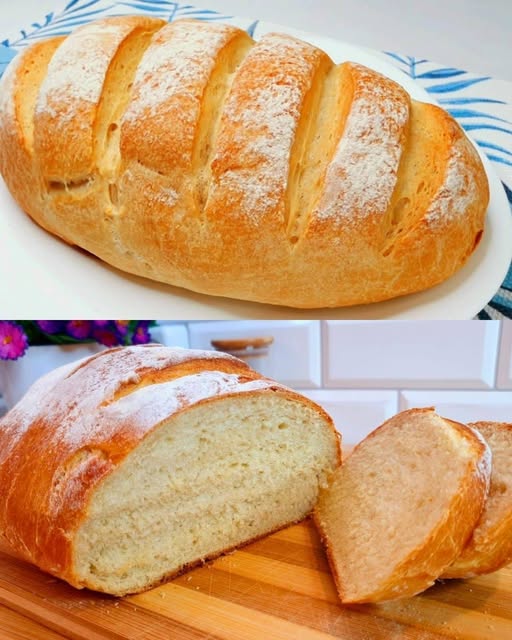
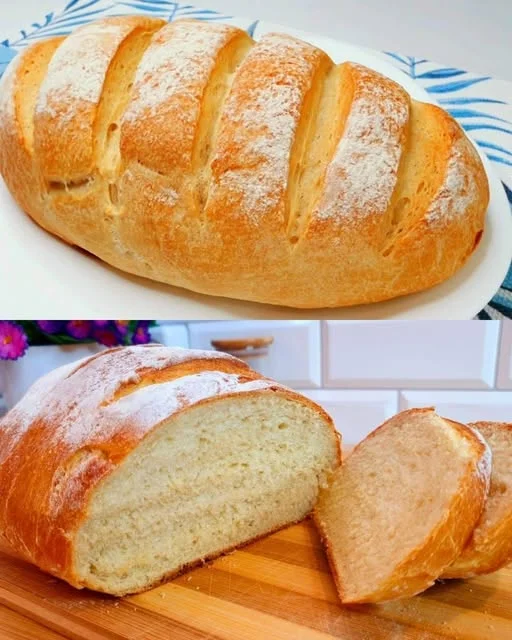
Homemade Bread in Minutes – The Recipe That Changed Everything
This homemade bread is soft, airy, and incredibly easy to make! With a perfectly golden crust and a light, fluffy interior, it’s the perfect alternative to store-bought bread. No long proofing times, no complicated techniques—just simple ingredients and a foolproof method that guarantees delicious results every time.
- Prep Time: 10 minutes
- Cook Time: 25 minutes
- Total Time: 35 minutes
- Yield: 6–8 slices 1x
- Category: Bread
- Method: Baking
- Cuisine: International
Ingredients
- 350g wheat flour, sifted
- 1 teaspoon sugar
- 1 teaspoon salt
- 5g dry yeast
- 210ml boiled but not hot water
- 30g vegetable oil
- Additional flour for dusting
- Milk for brushing
- Butter for brushing
Instructions
- In a mixing bowl, combine the sifted flour, sugar, salt, and dry yeast.
- Gradually add the warm water and vegetable oil, mixing until a soft dough forms.
- Knead the dough for about 5 minutes until smooth, then cover and let it rest for 10 minutes.
- Lightly flour a surface, shape the dough into a loaf, and place it on a baking tray. Cover and let it rise for 20-30 minutes.
- Preheat the oven to 375°F (190°C). Brush the top of the dough with milk and bake for 20-25 minutes, or until golden brown.
- Remove from the oven and immediately brush with butter for a soft, glossy crust.
- Let cool slightly before slicing and serving.
Notes
- For a crispier crust, bake at a slightly higher temperature (400°F/200°C) for the last 5 minutes.
- This bread is best enjoyed fresh but can be stored in an airtight container for up to 2 days.
- If using whole wheat flour, add an extra tablespoon of water to keep the dough from being too dry.
- This dough can also be shaped into rolls for individual servings.